> For the complete documentation index, see [llms.txt](https://badland-batteries.gitbook.io/b/llms.txt). Markdown versions of documentation pages are available by appending `.md` to page URLs; this page is available as [Markdown](https://badland-batteries.gitbook.io/b/12s-17000mah-15c-user-manual/connecting-to-the-battery-with-dronecan-gui-tool.md).
# Connecting to the Battery with DroneCAN GUI Tool
**Setup**
Download and install the DroneCAN GUI Tool and connect your computer to the battery over CAN by following the instructions at
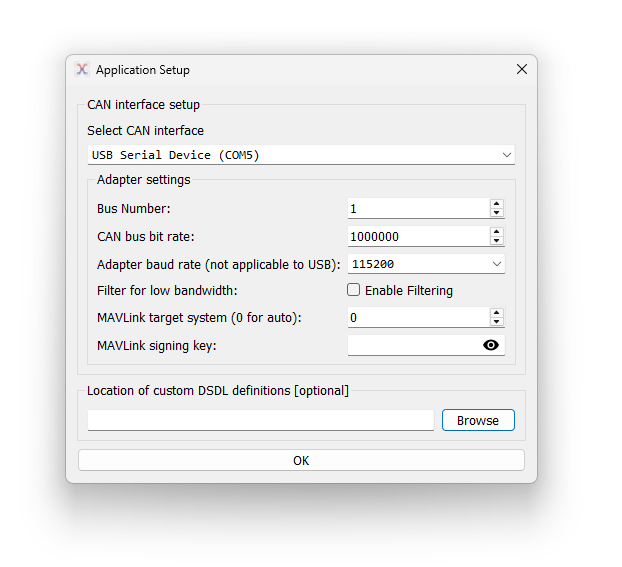
Open the DroneCAN GUI Tool and select the correct interface. Leave the other settings as they are and click OK.
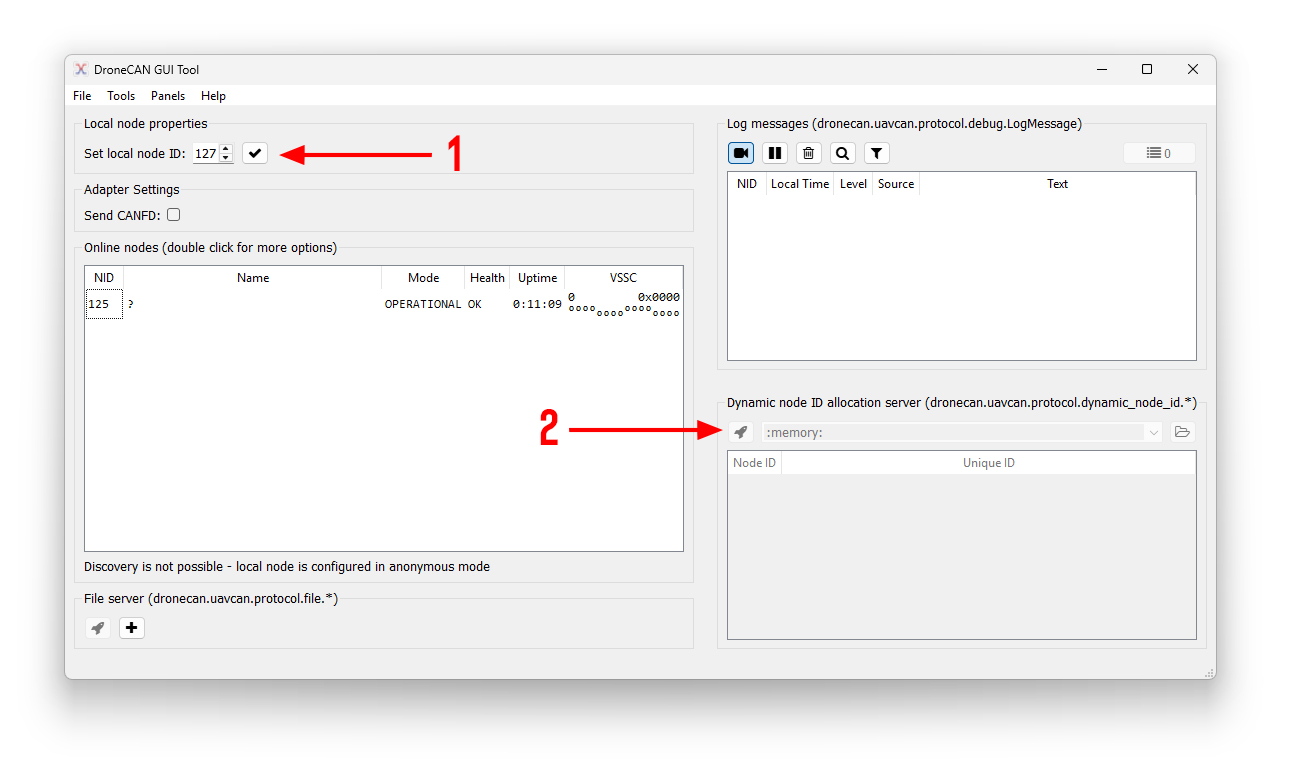
Click on the checkmark. Then click the rocket ship.
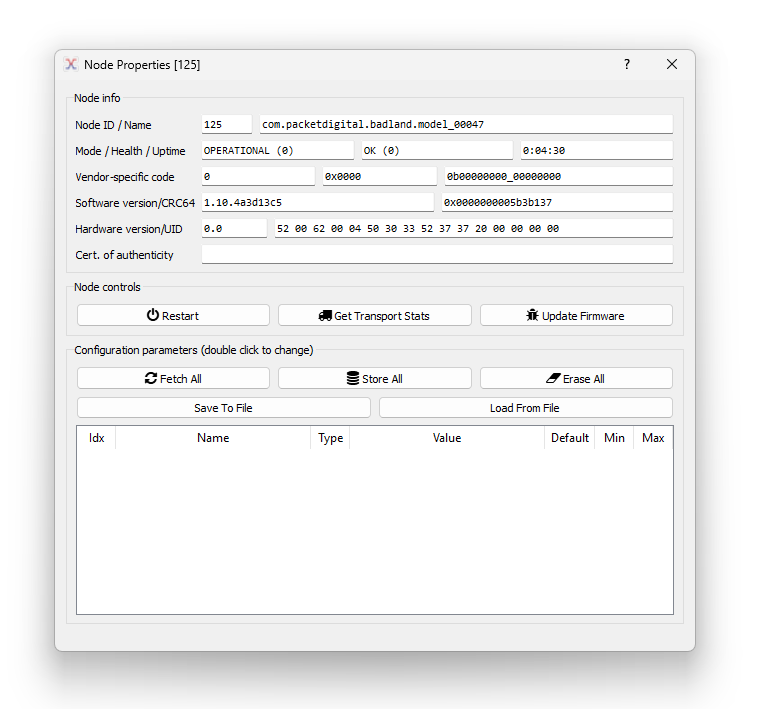
Double click on the node name text of the battery. It starts with “com.packetdigital.”
The “Node Properties” window appears.
**Setting Parameters**
(Parameter details are covered in the section “[Parameter Details](/b/12s-17000mah-15c-user-manual/parameter-details.md).”)
First follow the instructions in the subsection “Setup.”
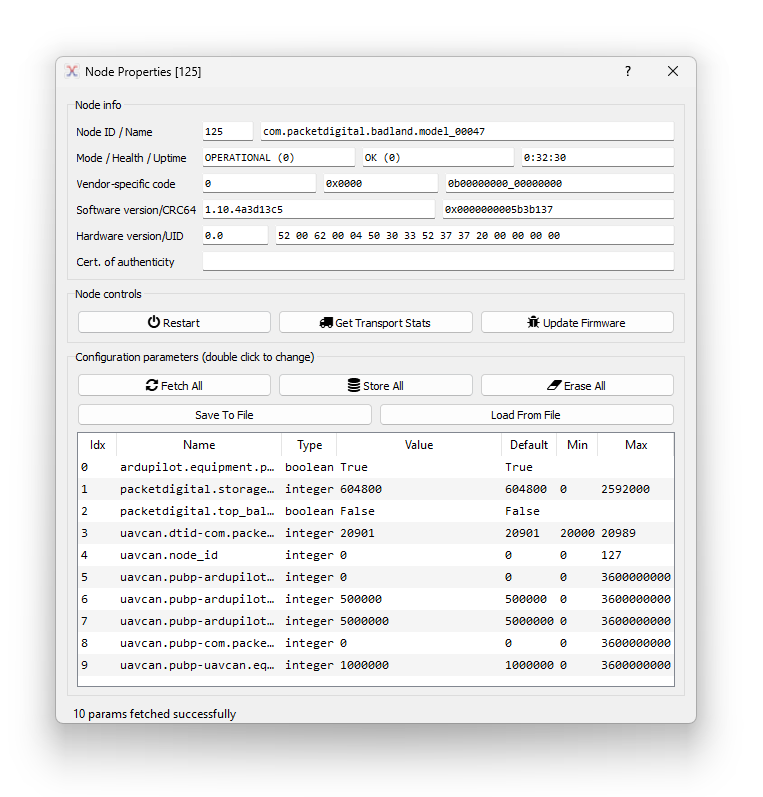
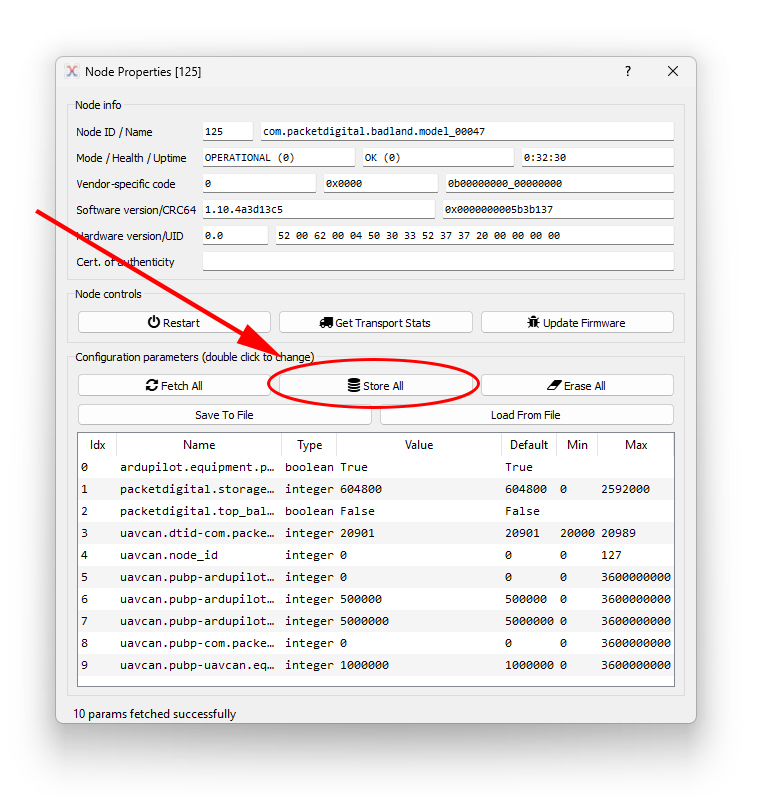
In the “Node Properties” window, click on “Fetch All.” The parameters appear.
To open up a setting, double click on one of the rows in the configuration parameters.
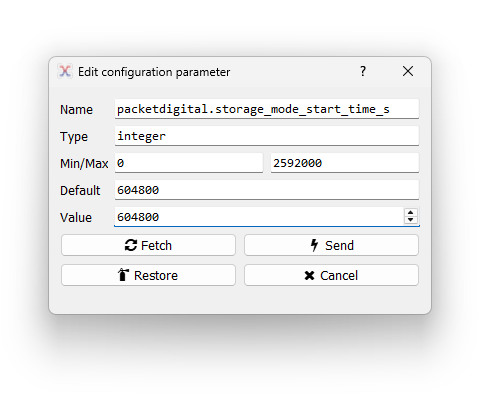
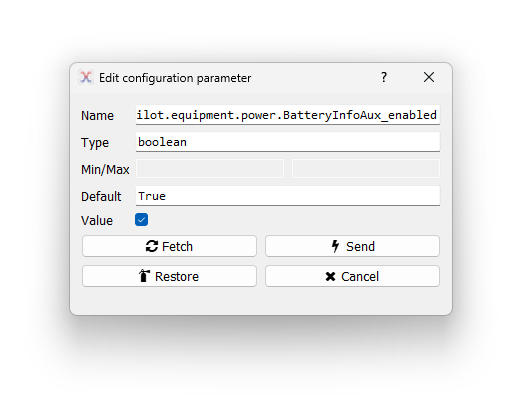
The configuration window appears. The parameter will either be an integer (a number) or a boolean (an on or off value).
To change a setting, enter a value into the “Value” box. It must be within the “Min/Max” values specified. For boolean values, check or uncheck the box to change its value. Then click “Send” and close the window.
On the “Node Properties” window, you must click “Store All” to save the changes.
*NOTE:* If you just changed the “uavcan.node\_id” parameter, that window is no longer valid. In order to click “Store All,” you must first close the "Node Properties" window, double click the node with the new id you just set, and then click “Store All.”
**Restoring All Parameters to Defaults**
First follow the instructions in the subsection “Setup.”
On the “Node Properties” window, click on “Erase All.” Click “Yes” on the window which pops up.
All parameters have been set to the default values. (You may need to click “Fetch All” again to see the up-to-date values.)
**Updating Firmware**
The most recent version of firmware can be downloaded [here](https://downloads.badlandsbatteries.com/1020-00047/encrypted_app_v1.14.0-0-g0cf2664.bin).
First follow the instructions in the subsection “Setup.”
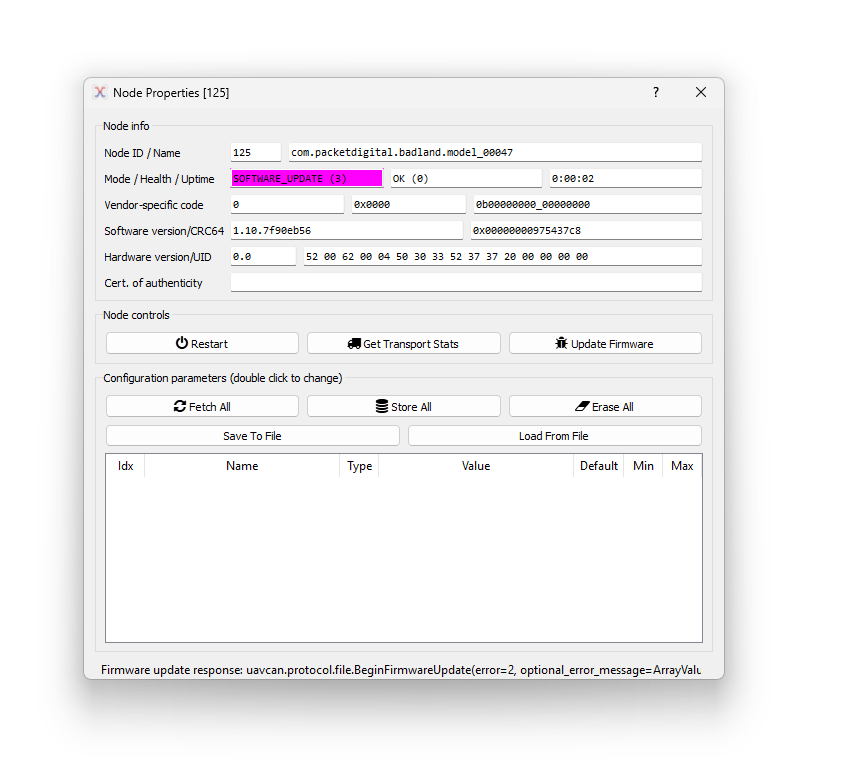
On the “Node Properties” window, click on the “Update Firmware” button. Then select the firmware update file from your computer.
The firmware update starts and the “Mode” box shows “SOFTWARE\_UPDATE” and the center LED flashes on the battery. *NOTE:* The “Health” box may show an error momentarily.
Wait until the “Mode” box goes back to “OPERATIONAL.” The firmware update is now complete.
If the firmware update gets interrupted, the center LED will continue flashing on the battery. Simply start over and update the firmware again.
Never discharge or charge the battery if only the center LED is flashing, or if the LEDs won’t respond when you push the button.
**Viewing Messages**
This describes how to view the messages that the battery is broadcasting onto CAN. This is the most complete way to be able to see information about the battery.
First follow the instructions in the section “Setup,” except stay on the main window.
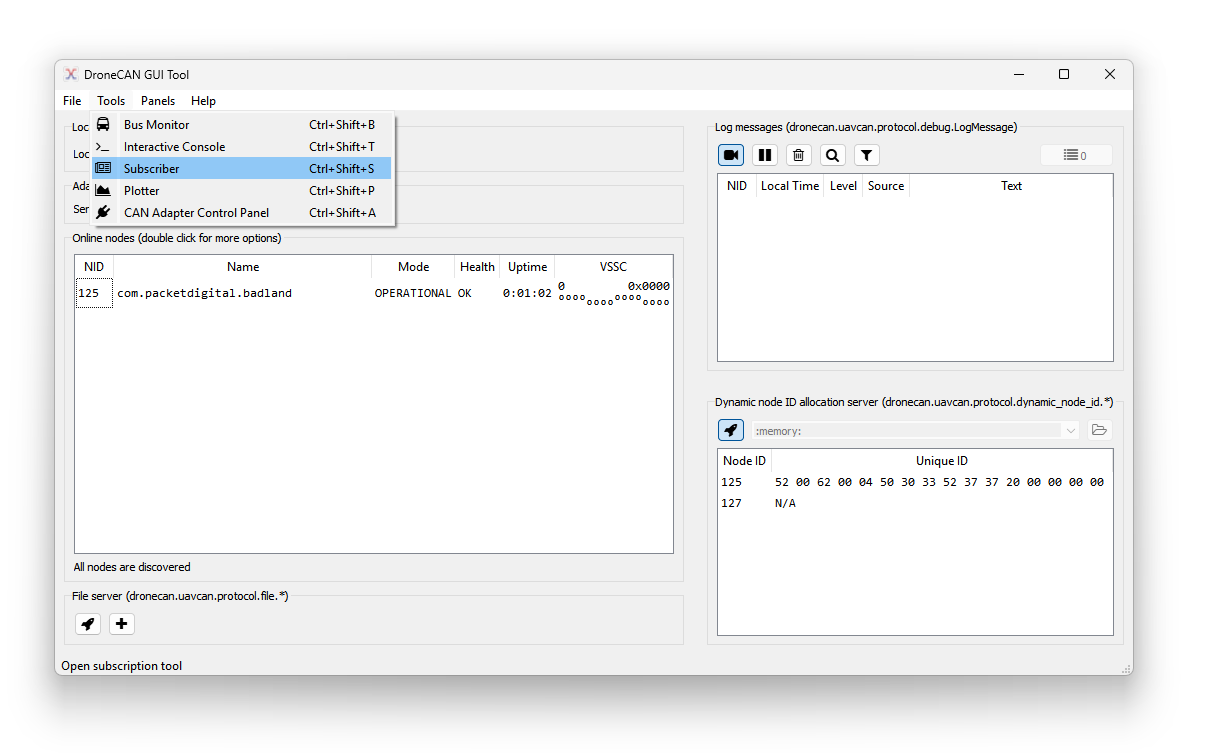
On the main page, go to the top bar and click “Tools” > “Subscriber.”
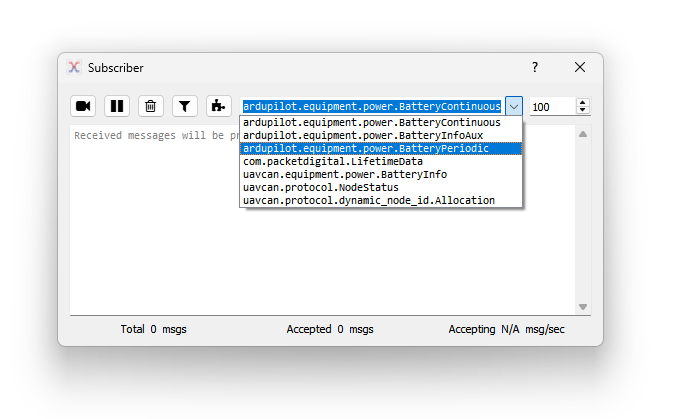
Select the desired message type and click the camera icon.
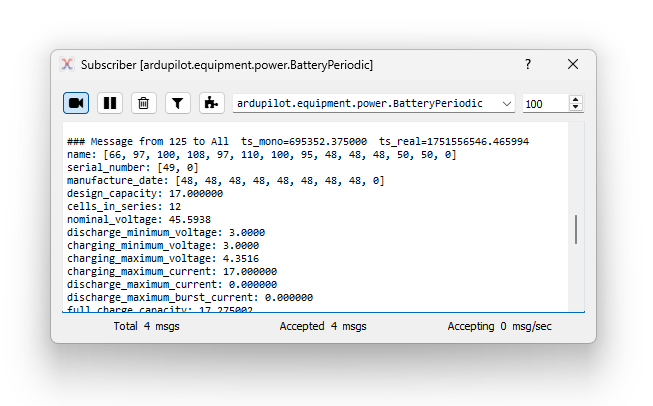
*NOTE:* Every time you change the message type, you must deselect and select the camera icon.
The messages will appear with the most recent on the bottom. If your desired message is not in the selection, that means the message has not yet been seen on the CAN bus. You may need to wait a few seconds or you may have disabled the message in the parameters.
*NOTE:* This shows messages from all nodes on the bus. If there is more than one node on the bus, ensure you are looking at the correct data by checking the node ID shown in the message.